A quick note folks to say that my blogs on here and my sister facebook page, link below, will be posted on a Tuesday and a Friday. I think it makes it easier if you know when they will be published. Thanks folks :)
https://www.facebook.com/flavourforlife/
Tuesday, January 30, 2018
Monday, January 29, 2018
Pasta Spaghetti Bake
To some folk leftover pasta, of any description, is less than appealing. Cold and sticky it would at first glance look like it should head to the compost or even worse the garbage. That is my opinion is a cardinal kitchen sin, wasting anything is a BIG no no.

A meal of simple tomato spaghetti proved too much for one meal and recently I had a leftover conundrum. Not to worry as I resurrected the sorry lump of stuck together spaghetti's and turned them into a delicious pasta bake. Alongside the pasta in the fridge was a bowl of potato water that needed to be used up also.
All I did was cut up the spaghetti with a knife and seperated it as best as I could. I then added a few large spoonful's of potato water, water is fine too as it is more to stop the pasta from burning.
With a topping of grated cheese and a sprinkle of parmesan the dish was a delight.

Baked for 40 minutes on 350 degrees until hot and bubbly.
Waste not want not folks, even pasta can be re-invented :)
Friday, January 26, 2018
House clean, breath clean and be clean!
Just a quick post to re-birth an older blog I had made a good while ago on natural cleaners for our home. Many folks fill their homes with in my opinion bad and fake smelling cleaners that are full of chemicals and false ingredients that can quite literally make you sick.
We all like a nice clean home but at what cost? Don't do it folks, make your own that is easy, natural and does not cost the earth in more way's than one.
Try this simple all purpose cleaner that can be used anywhere -
Lemon and orange rinds (mixed together or on their own), I usually buy organic and not waxed. Save them in the freezer until you have a few if you do not use a few lemons or oranges at a time.
White vinegar
A glass jar, I use a litre jar but my last batch was a half litre jar
Simply place the peels in the jar and cover with vinegar, let it sit for two weeks shaking it every now and again. Then, sieve into a spray bottle and clean to your hearts content happy knowing that not only did you use the peels that may have been discarded but your are using a completely gentle and natural cleaner.
Used in conjunction with baking soda this cleaner is a powerful stain remover for bathrooms and kitchen worktops.
Essential oils also make a fantastic cleaner for areas that need a less harsh approach. The best oils I use are Tea Tree, Lavender, any Citrus essential oils and Peppermint. Fill a spray bottle with water, add a little drop or two of dish soap (natural of course) and add to that several drops of your chosen essential oils. You will learn what mixes you like to use.
We all like a nice clean home but at what cost? Don't do it folks, make your own that is easy, natural and does not cost the earth in more way's than one.
Try this simple all purpose cleaner that can be used anywhere -
Lemon and orange rinds (mixed together or on their own), I usually buy organic and not waxed. Save them in the freezer until you have a few if you do not use a few lemons or oranges at a time.
White vinegar
A glass jar, I use a litre jar but my last batch was a half litre jar
Simply place the peels in the jar and cover with vinegar, let it sit for two weeks shaking it every now and again. Then, sieve into a spray bottle and clean to your hearts content happy knowing that not only did you use the peels that may have been discarded but your are using a completely gentle and natural cleaner.
Used in conjunction with baking soda this cleaner is a powerful stain remover for bathrooms and kitchen worktops.
 |
| Smells lemony! |
Lets get to the bottom about dried beans with an Easy Peasy Beany Bake!
'Beans, beans good for the heart, the more you eat the more you .......... yeah yeah we all know the end!' Beans do have that effect on us and sometimes it can be rather unpleasant. However, beans are a fantastic food. They are full of protein, iron and vitamins. So they are well worth adding to your diet. The problem some folks have is they do not know how to deal with dry beans or use them. It is easy.
Here is a simple to make recipe using dried beans and pulses -
Easy Peasy Beany Bake
A selection of beans and lentils, brown rice, pearl barley. About 1 cup
1 medium carrot, chopped into small dice
1 small onion, chopped into small dice
1 cup of breadcrumbs, fresh or dried
2 eggs
1 heaped tsp of garlic powder
1 1/2 tsp of paprika
1 1/2 tsp of dried parsley
1 tsp of salt
1/2 tsp of dried mint
1 tsp of thyme
1/2 tsp of celery seeds
2 tbsp of ground kale powder or finely chopped fresh kale
The night before soak the beans, lentils, and brown rice. There is no set amount of each or the type of beans or lentils used, I just threw in a bit of yellow split peas, red lentils, pearl barley, brown rice and two different types of dried beans (ones we grew on our homestead)

The next day cook the beans and pulses until tender, do not worry if some go mushy as they will be getting mashed anyway.
Once the beans and pulses are cooked and cooled fry the onion and carrot until slightly browned.
Mash the bean mix with a potato masher, you want to leave some of the beans whole for texture.

Add all the ingredients to the bean mix and stir it all together until well incorporated.

Place in a suitable sized baking dish and bake on 350 degrees for about 50 minutes or until firm and cooked through.
Serve with what you like. A good cheese sauce goes wonders with it :)

I have a great leftover dish for the any remaining bean bake, zip across to my Facebook page and take a look. That recipe will be there shortly, link below.
https://www.facebook.com/flavourforlife/
Wednesday, January 24, 2018
Healing Turmeric milk
At the first signs of illness the one thing we should all grab is the jar of turmeric and make a turmeric milk or golden milk as it is often called.
Turmeric has long been used not only as a spice but as a healing and preventative treatment for many ailments and disease.
So folks next time you feel the sniffles coming on give it a go. It really works.
This is what you need -
1 cup of milk
1 tbsp of turmeric powder, make sure it is good quality folks
3/4 tbsp of cinnamon
1/2 tbsp of honey
1/2 tsp of ground black pepper

The pepper is needed for a good reason. The piperine in the pepper helps the body easier absorb the curcumin in the turmeric at a higher level than if pepper was not used.
Simply add all of the ingredients into a pan and gently boil for about half an hour.

It may not be the prettiest picture but it is in itself a natural germ fighting machine. Let it cool slightly and drink hot.

My recipe is tailored to our taste, however you can change it up or down to suit you as long as no ingredients are missed out!
Where did all the snow go?
Believe it or not folks a day ago we had a pretty good covering of the white stuff. Today, apart from a few lumps here and there it has all gone. The reason for this overnight transformation was rain, and lots of it. It washed all the snow away.
What a good time to have a little stroll to see what was going on.
Baxter our Springer Spaniel decided once again to run after a resident grouse that calls the top of our tree line home. I don't think he will ever catch it!

Two of the big old maple tree's look so majestic even at this time of year, I bet they could tell some tales of times gone by. In a couple of weeks they will be producing beautiful sweet sap that we will be making syrup with.

The garden looks, well, like a wash out but there is some life already. The chives and oregano are showing signs of life.
I have a big pot of fruit boiling to make jelly out of last years pick of chokecherries, haw berries and small wild blackberries with a few apple cores thrown in to help set the jelly.

All is well on the homestead.
What a good time to have a little stroll to see what was going on.
Baxter our Springer Spaniel decided once again to run after a resident grouse that calls the top of our tree line home. I don't think he will ever catch it!

Two of the big old maple tree's look so majestic even at this time of year, I bet they could tell some tales of times gone by. In a couple of weeks they will be producing beautiful sweet sap that we will be making syrup with.

The garden looks, well, like a wash out but there is some life already. The chives and oregano are showing signs of life.
 |
| Can you spot the scarecrow who lost a fight with the wind? |
I have a big pot of fruit boiling to make jelly out of last years pick of chokecherries, haw berries and small wild blackberries with a few apple cores thrown in to help set the jelly.

All is well on the homestead.
Monday, January 22, 2018
Steak Marinade
Those folks who follow my blog and Facebook page will know that we raised and butchered a beef steer last year. Grass fed this beef is beautiful and flavorful and made even more so by the fact we knew exactly what he ate and how he ended his days, all here on our homestead.


The beef can easily stand alone with a bit of seasoning and is delicious simply cooked. However, I thought I would ramp it up and make beef marinade.

Here is what you need for the marinade (it may need downsizing or upsizing depending on the amount of steak-
Beef steak, enough to meet your requirements (I used 3 small rump steaks)
4 tbsp of extra virgin olive oil
1 tbsp of english mustard or the like, not the yellow stuff you put on those dreadful hotdogs
2 tbsp worcestershire sauce
2 cloves of garlic, chopped fine
1 tbsp paprika
2 heaped tbsp of brown sauce, I use homemade (See below for more on brown sauce)
Marinade the steaks in the above for at least 6 hours, overnight is best
When it is time to cook, take the steaks out of the marinade and fry until browned on both sides. The steaks are to be braised more than dry cooked.
DO NOT THROW THE MARINADE AWAY
Ingredients for the rest of the dish -
1 medium onion, sliced
As many mushrooms as you like, sliced
Salt and pepper
Once the steaks are slightly cooked take them out of the pan and fry the mushrooms and onion until soft and brown. Now pour in the saved marinade and add about 3/4 of water. Cook for 10 minutes, stirring often. You are looking or a thickish sauce so you may need to add a bit more water.
After 10 minutes add the steaks back into the pan and cook until desired tenderness. Again, add a little more water if needed.
Taste and season with salt and pepper. Enjoy :)

Brown Sauce - You can buy this in most stores in the UK and in some here in Canada but if you use brown sauce I would suggest making your own as it is much easier and healthier.
The recipe I used was from a good friend of mine, the link is below
Sunday, January 21, 2018
Maple syrup and bee hives
Well folks once again time seem's to be flying on our homestead. The weather is milder than it was this time last year and it looks like we may be able to start tapping our maple tree's two weeks early. Favorable conditions for the flow of the maple sap is when the nighttime temperatures are below freezing and the daytime temperatures are above freezing. It can be a bit of a juggle to get it right, but this is our second year and we know what we are doing. I have three more tree's lined up for this year so we should get a good harvest.
.
This year we will be introducing bee's to our homestead, FINALLY! Yes, folks we have the hives and now we await the bee's. We will not be getting the little buzzers until the warmer month of June. They will be the smallest livestock we have raised but they will be treated with the same respect and care as the rest of the critters here. They will provide essential pollination services for our flora and fauna and in turn provide delicious honey in a year or too once established.

So folks, watch this space.
.
 |
| One day's worth of sugaring last year in 2017 |
This year we will be introducing bee's to our homestead, FINALLY! Yes, folks we have the hives and now we await the bee's. We will not be getting the little buzzers until the warmer month of June. They will be the smallest livestock we have raised but they will be treated with the same respect and care as the rest of the critters here. They will provide essential pollination services for our flora and fauna and in turn provide delicious honey in a year or too once established.

So folks, watch this space.
Saturday, January 20, 2018
Jack and Jerry Cake
This is a fantastic looking cake and tasty too. It is also a Nova Scotia recipe so all the better! I have adapted the original recipe slightly.

This is what you need for the main cake mix-
3 cups of all purpose flour or self raising
1 tsp baking powder (omit if you have S.R flour)
3 eggs
1 cup of sugar
1 cup of butter (melted)
1 cup of milk
1 tsp vanilla, the real stuff folks!
Mix all of the above together until well combined
Divide the mixture into two parts
To one of the halves add -
1 tsp cloves
1 tsp cinnamon
2 tbsp of molasses, again the real stuff, preferably unsulphured organic
Place the dark mix on the bottom of a cake pan, round or square. I use a 10 inch round pan.
Then put the light mixture on the top and bake on 350 degrees until cooked. Cooking times vary but mine was cooked after 40 minutes.
Enjoy with a nice cup of tea or coffee is you prefer :)

Friday, January 19, 2018
Medicinal Milk
Two of my favourite go to medicinal drinks are molasses milk and golden milk. Although I tend to lean on them more when there is sickness in the household they are both an enjoyable and soothing drink.
Today I feature molasses milk, I shall do a blog on the health benefits of golden milk in one of my next weeks blogs.

Molasses milk is super easy to make folks, so easy I am surprised it is not more widely used. Take a cup of milk and in a pan gently heat until warm, add a tsp or so of molasses or to your individual taste. Heat until hot but do not let it boil.
Enjoy with a sprinkle of mace or nutmeg if you prefer :)

Molasses is stock full of goodies. It contains Calcium, Iron, Vitamin B6, Magnesium and Zinc so it is quite the lesser known powerhouse.
It is essential that you use good quality molasses as some of the cheaper brands can be adulterated with less than beneficial additives. I use organic unsulphured molasses.
Wednesday, January 17, 2018
The great bulb, Garlic
You either love it or hate it, there is rarely an inbetween. We love it in our household, well, the adults do! I will eat it in mass amounts, cooked and even raw. In fact slices of raw garlic on a cheese sandwich is just a marriage made in heaven.
Garlic is a huge health booster in more ways than can be listed here. It is a free radical fighter, a cold and flu killer, antibacterial and an antiseptic. It is a must that should be included as part of our daily diet.
Here is a quick way in which to enjoy this wonderful bulb -

Roasted garlic is mild and aromatic and easy to do, put whole bulbs of garlic in a cooking vessel and drizzle with olive oil. Cook on 350 degree's until soft to the touch and browned. It can be mashed into potatoes, added to soups or one of my favourites is simply spread it on hot toast.

Foraging for wine
I love to forage, foraging is super way to get outside and be with nature. In the spring and Summer we forage for wine, there are many main wine ingredients growing all around us. Oak leaves, Beech leaves, blueberries, blackberries .............. the list is long. Some may sound a bit different but they do actually make superb wine. And, the added bonus is you know exactly what is in it, no sulphites and no chemicals. All natural.

With the weather being a bit snowy we had a spare bit of time to rack the wines we currently have on the go. They shall bottled over the next few weeks.

Goldenrod, parsley and rosehip are happy clearing in the kitchen. The goldenrod and parsley was picked right here on our homestead and the rose hips came from wild rose bushes growing like weeds next to one of the local beaches. These are just a few of the many varieties of wine we make.
 |
| From left to right - goldenrod, rosehip and parlsey wine |
Folks, if you would like recipes on the above or ask more about wine making with nature shoot me a message and I can include them in a future blog or two or even three :)
Monday, January 15, 2018
A pot of heaven (Bone broth)
One of the best tasting foods in my opinion is bone broth. Bone broth is just so fulfilling, it is hot, tasty, extremely beneficial for us, versatile and plain old satisfying even on its own. So when combined with the left over meat that came from the bones, a few vege's and some noodles it is surely in the top five.
The trick to making good broth is too make sure you boil the bones for many hours on a low heat, all day or overnight. That releases all the essential nutrients that are hidden away in the hard bones. The liquor that I usually cook the bones in is usually veg water that I save. Water is fine too.
Add a quartered onion, a sliced carrot, celery,, a good twist of black pepper/salt, herbs of your choice ( I used dried thyme and parsley) and some garlic and simmer away for at least 8 hours.

Tip - Roasting the bones in the oven until browned prior to adding to the cooking liquor will add a lovely depth to the finished broth, but it is not necessary. All left over bones can be used, including chicken carcasses
One the broth is cooked add what you like. I added the left over meat, some dehydrated vegetables and homemade egg noodles. Cooked until the extras were done and serve with fresh homemade bread. What a meal on a cold night!

The recipe for the egg noodles can be found on my sister page over on Facebook. Link to the side.
Rissoles
Many a leftover can be made into a something very special, in the form of a rissole. Rissoles were very common when food was at a shortage, the ingredients and taste varied each time due to the amounts and combination of leftovers that needed using up. In my opinion if you have never cooked and eaten a rissole you have missed out on a tasty and easy treat. In fact they are so good I often make extra when I make a roast just to make these.
I cannot give specific amounts here as leftovers vary on what you have lying around, however it is an easy recipe so give it a go.
You will need -
Leftovers, usually vegetables and meat (the meat I used was pork)
1 or 2 eggs to bind depending on amount of leftovers being used
Enough flour to be able to shape the dough without it clogging up your hands
Salt and pepper to taste

The idea is you want the rissoles to stay together when cooking, unfortunately I skipped the egg and flour step for a reason I cannot fathom. So, don't skip that part folks!
Chop up the meat and vegetables small enough for a food processor to mush it all up, don't worry if there are a few lumps left behind.
Shape the rissoles as you like, I made small sausage shapes. I also rolled them in a little flour before frying them until hot and crispy.

I served them with seasoned roast wedge potatoes, veg and leftover gravy from the roast.

Yum Yum :)
Sunday, January 14, 2018
Fellow followers
Hey folks, I just thought I would say thank you for taking an interest in my bloggins. Please make sure you click the follow button on my page to keep updated with whats going on :)
Reusable veg
As you all know by now folks I will try to get as much out of stuff as I can. A friend of mine recently told me my byword should be 'Waste not want not.' and to be fair that is a good fit for me. This waste not want not rule of mine can be applied to some vegetables.
There are a few things in the veg world that will re-grow and provide a small harvest. Now don't expect huge results, but anything is better than nothing and if it is free all the better!
My recent attempts are growing, the celery has begun to sprout and my onion has been set in its water bath.


All you need to do is once you have finished your celery pop the root section in a bit of water and watch it re-grow. The same applies with the onion root section. The onion will not provide a new onion but it will send out some green shoots that can be used. Once the roots get going well you can transplant them into a shallow pot of potting soil. If you set a few of these at once it is worth it, as I always say no waste needed :)
Saturday, January 13, 2018
Homemade beef jerky
Sadly, shop bought beef jerky is not as natural or as good for you as it should be. It is a simple product that has been like many these days adulterated with numerous additives that quite frankly are bad for your health. However, it is quite easy to make at home with little effort.


Here's how to make the best beef jerky you will ever taste, with no guilt!
You will need -
2 pounds of beef
(Flank is good as it is thin, however I used offcuts from our beef steer and it was a mix of cuts)
1/4 cup soy sauce
2 tbsp of worcester sauce
2 tbsp brown sugar
2 tbsp smoked paprika (I use this instead of liquid smoke)
1 tsp regular paprika
1 tsp garlic powder
2 tsp salt
1 tsp or more of cracked black pepper, use to your taste
Cut the meat into slices no bigger than 1/4 inch (see tip below)
Place in a roomy bowl and add all the ingredients, mix well
The jerky should marinade for at least 8 hours or better still overnight
The next day place the jerky which will be smelling wonderful in a strainer as the liquid marinade needs to drain. (The remaining marinade can be used again, I used it on a pork roast)


This next step is absolutely crucial and cannot be missed, the beef must be heated to kill any potential bacteria. This should be done by placing the meat on a tray and cooking it for 20 minutes on 300 degrees. I must admit that I did give it an extra 5 minutes to be sure.
Once the jerky has cooled it is time to cook it. I use a dehydrator set on its highest setting, the jerky will cook on a temperature around 170 degrees for quite a few hours. If you are using an oven set the temperature on its lowest setting which on our cooker is 170.

Tip - If you find it a bit of a struggle to cut the beef so thin, you can place it between two sheets of clingfilm and bash them with a meat tenderizer or a rolling pin until desired thinness!

The jerky can take anywhere between 7 and 15 hours to cook, mine was ready after 8 hours. It must be slightly bendy but not so brittle that it falls to pieces. If in doubt cook it a bit longer.
Once it has finished cooking, let it cool and pack it into a jar or if you have a vacuum sealer use that keep the jerky longer. I put some in vacuum sealed bags in the freezer and the rest in a jar in the fridge.
Enjoy!
 |
| The finished product |
Thursday, January 11, 2018
The simple things in life
Lets take my breakfast this morning, the humble egg! It can be prepared in several ways, and often totally cooked WRONG. Eggs prefer to be cooked slowly, take a fried egg for example, way too often the pan is heated to incinerator temperature and the poor egg is cooked as fast as possible within an inch of being a rubbery morsel.
 |
| Cook gently |
This is how I do it! Heat some oil and a knob of butter in a pan on medium to low heat. You need the pan hot enough to cook but not too hot to frazzle the egg too fast. Once the egg is in and the white starts to set, slowly using a spoon ladle over the hot oil and butter.
 |
| Served on toasted baking powder buiscuits |
Once done your taste buds and the egg will thank you for taking your time to prepare one of the most simple things in life :)
Happy hens!
I thought I would share the joy of my hens as they ate there scrap breakfast this morning. It was the food waste that we cannot consume that they find very tasty. I mix there scraps in with a bit of their normal ration and add a couple of teaspoons of apple cider vinegar. The vinegar keeps them in good shape over winter, it is a good immune system booster. They love it!


 |
| Happy Hens make lots of eggs! |
Wednesday, January 10, 2018
Bits and bobs crumble
On the recent subject of food waste I found numerous food items that needed using up, the fruit bowl was home to some rather sorry looking kiwi's and the fridge was hiding a multitude of miserable odds and ends, mostly fruit and some old crumble topping and ginger cake crumbs.
I did slightly cheat and added some wild blurberries and blackberries picked right here on our homestead. They were not in the needed to be used desperately category!
It all came together nicely to make a lovely fruity crumble.
Unfortunately the crumble smelled so good whilst cooking it was demolished before I could take it's photograph complete with its crumble topping!

Food Waste
As many of you will know I cannot abide food waste, on mass or at home. I find it intolerable that so much good food is tossed away for no reason what so ever. There is no need to waste anything, in one way or another it can be used. At home we eat lots of leftovers, on the odd occasion some leftovers may sit around a little to long, usually when we have an abundance of leftovers!
In that case the chickens get a free meal, and in return we get delicious eggs. They seem to lay better when they get the odd treat!
Any foodstuffs that cannot be eaten finds it way into our compost bin or into our ever growing compost trenches in which we will grow vegetables.
In our kitchen we have two containers, yogurt pots do a good job. One is for chicken scraps, in that goes plate scrapings, crumbs and all that sort of stuff and the other is for the compost.
The cycle turns full circle, help it turn the right way folks.
Tuesday, January 9, 2018
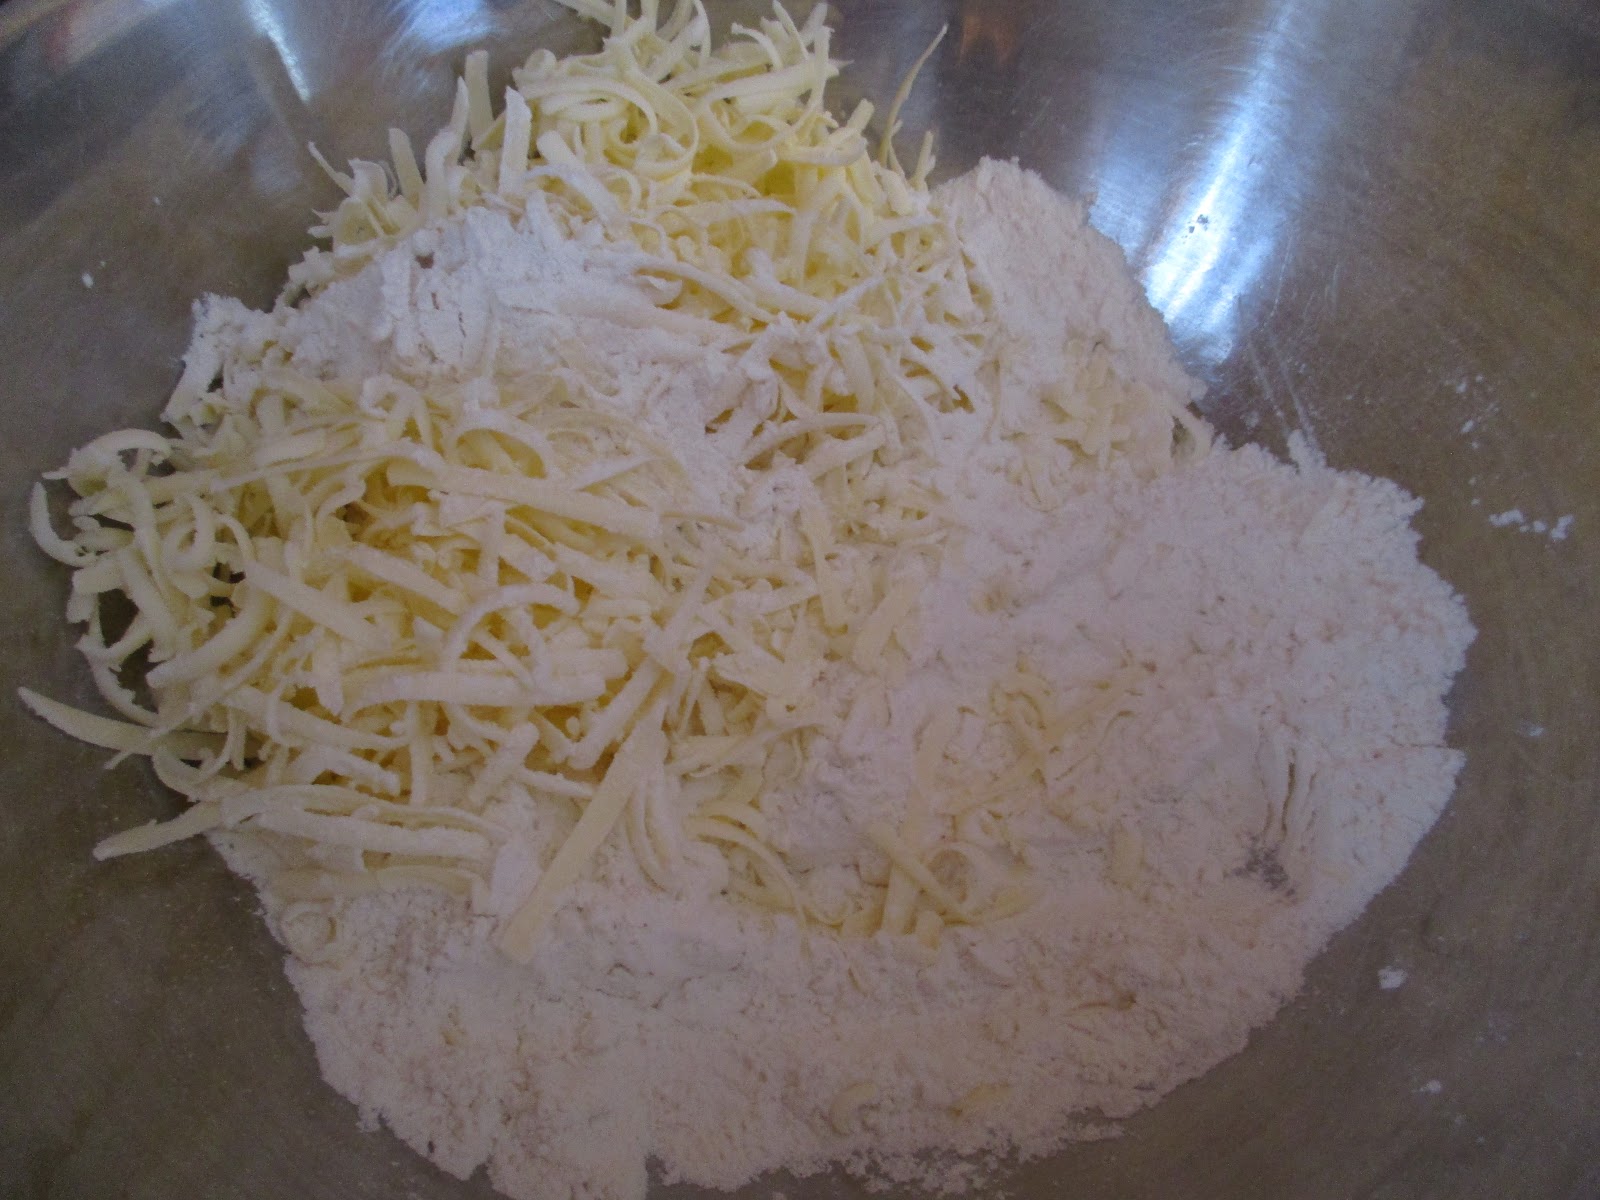
The best flaky pastry
Over the months I have been trying to refine the art of making the best pastry for making pies, pies of most kinds. I can and on the odd occasion make a rough puff but found that it is much quicker to make a flaky pastry, I also found that if made correctly it resembles rough puff anyway.
We love pies, apple pies, meat pies, left over pies, even left over pastry with a bit of cheese on goes down well. The lastest pie was left over pie, made with leftover kale, cabbage, potato, carrots and a small amount of fried ground beef which came from Jeff our beef steer.
The pie is featured on my Facebook page (link below) But, here is the pastry recipe!
14 ounces of white flour ( I use organic unbleached)
7 ounces of salted butter
Cold water, amounts vary each time.

Firstly it is important to remember two things, for flaky pastry always grate the butter into the flour and secondly and most important DO NOT OVER WORK THE DOUGH. You need to see the grated butter in it.
Gently mix the butter and flour together until all the butter is coated. Add bit by bit enough water to bind the dough together without over working. Another important tip is if you are making a top and bottom make sure you cut the dough in half prior to rolling. If you re-knead and then re-roll the butter will combine too much and the flaky texture will be lost.

Link to my facebook page -
https://www.facebook.com/flavourforlife/
We love pies, apple pies, meat pies, left over pies, even left over pastry with a bit of cheese on goes down well. The lastest pie was left over pie, made with leftover kale, cabbage, potato, carrots and a small amount of fried ground beef which came from Jeff our beef steer.
The pie is featured on my Facebook page (link below) But, here is the pastry recipe!
14 ounces of white flour ( I use organic unbleached)
7 ounces of salted butter
Cold water, amounts vary each time.
Firstly it is important to remember two things, for flaky pastry always grate the butter into the flour and secondly and most important DO NOT OVER WORK THE DOUGH. You need to see the grated butter in it.
Gently mix the butter and flour together until all the butter is coated. Add bit by bit enough water to bind the dough together without over working. Another important tip is if you are making a top and bottom make sure you cut the dough in half prior to rolling. If you re-knead and then re-roll the butter will combine too much and the flaky texture will be lost.

Link to my facebook page -
https://www.facebook.com/flavourforlife/
Subscribe to:
Posts (Atom)